Desktop - the Graphical Display of Entropia Universe
The desktop on your computer screen is highly customizable. The desktop can display default shortcut icons, your [Chat], [Contacts], [Message Center], [Radar], status information, and much more.
Shortcut Icons
The top left icons shortcuts:
- Main Menu: Access to game settings and exit dialogue.
- Support Center: Create and view support cases.
- Deposit: Transfer money to your PED Card.
- Actions: Open a list of all actions you can perform and bind keys to them.
- Event List: Get an overview of upcoming events.
- Hall of Fame: View Hall of Fame.
- Progress: View your professional progress.
- Skills: View information about your skills and attributes.
- Professions: View your skill-based professional standings.
- Inventory: Open your carried Inventory.
- Mission Log: View information about active and completed missions
- Codex: View the Codex.
- Message Center: Show/hide the Message Center.
Move around the icons bar by pressing the “L” key (Edit-Mode). Note that you cannot separate the icons from each other, nor can you remove the icons from your screen.
Chat
By default, the [Chat] window in the lower-left corner of the screen is the hub for text messages from the system, societies, and other Avatars. The Channel concept (described below) is at the core of the chat system, allowing users to create or join any private or public chat channels for their Avatar needs.
To resize the [Chat], you must enable [UI Edit-Mode] by pressing “L.” Hold the mouse button down on the bottom right arrow of the [Chat] and drag the mouse to resize the [Chat] window.
How to Use the Chat:
Press “Enter” to enter text in the selected tab and channel text input area, and start writing. Send your command or message by pressing “Enter” one more time.
The chat window features mouse-controlled options and a command line syntax for faster usage.
To list all the command line options, type /help
To find more details about a specific command, type /help <command name>
You can follow in-game links in chat messages by left-clicking the link. Right-click links to copy & paste them to other tabs or channels.
Writing to a Channel
When you type in a chat window, you always target a channel. You can see the name of the active channel, such as [Main] or [Rookie], at the left side of the text input area. To target another channel, prepend your message with “#” and the channel name: “#mychannel Hey, this place looks nice.”
Creating New Chat Channels
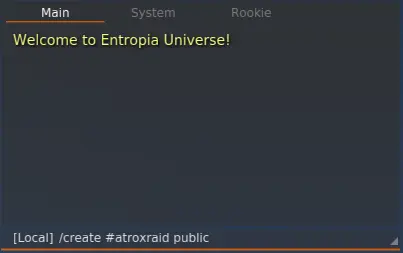
A chat channel can be public or private. A channel is created by typing (“/create” or “/c”) #channelname (“public” or “private”). The '/c' command is the concise alternative to '/create.'
If you want to create a public channel called “atroxraid,” you type the following in the chat: /create #atroxraid public or /c #atroxraid public .
Consider the following guidelines when setting up a chat channel:
- The channel name should always start with #
- The channel name should be 3-14 characters long and may consist of only letters or both letters and numbers
- Space and some other extended characters are not allowed in channel names
- The channel name will always be displayed in lowercase letters
- If you don't specify 'private' or 'public' after your channel name, our chat system defaults to make the chat private
Joining, Leaving, or Searching for a Channel
To join, request to join, or leave a channel, simply right-click the channel name and select the appropriate option.
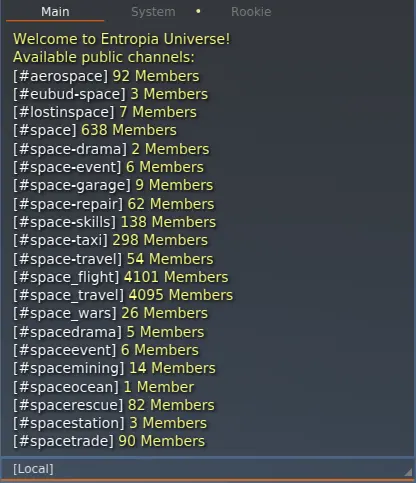
To find public channels, type /listchannels <filter>
For example, typing /listchannels space will list all channels containing the string “space.” Remember to type at least one letter or number for the search to succeed.
Private Channel Operator:
When creating a private channel, you are the designated channel operator (OP). The OP will receive all join requests for private channels. The OP can set other channel members as OP:s, remove other users' operator status, mute members, etc. With the /help command, you can find the available options and learn how to use them.
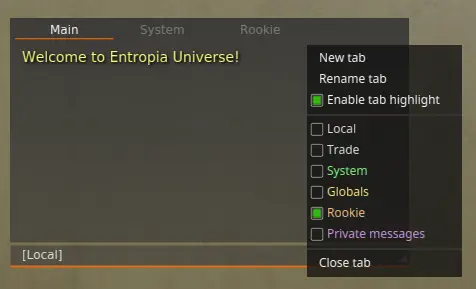
Tabs
Use Tabs to divide Chats and Channels. You can resize the [Chat] window and place it wherever you want on your screen. It's possible to drag out one or several tabs to separate windows to locate them elsewhere on your screen.
You can customize your chat by filtering channels and messages in all tabs. Each Channel can also be color-coded in each tab for enhanced readability. Right-click the tab header to see the tab filter options. (The Main and System tabs have some limited customizability options).
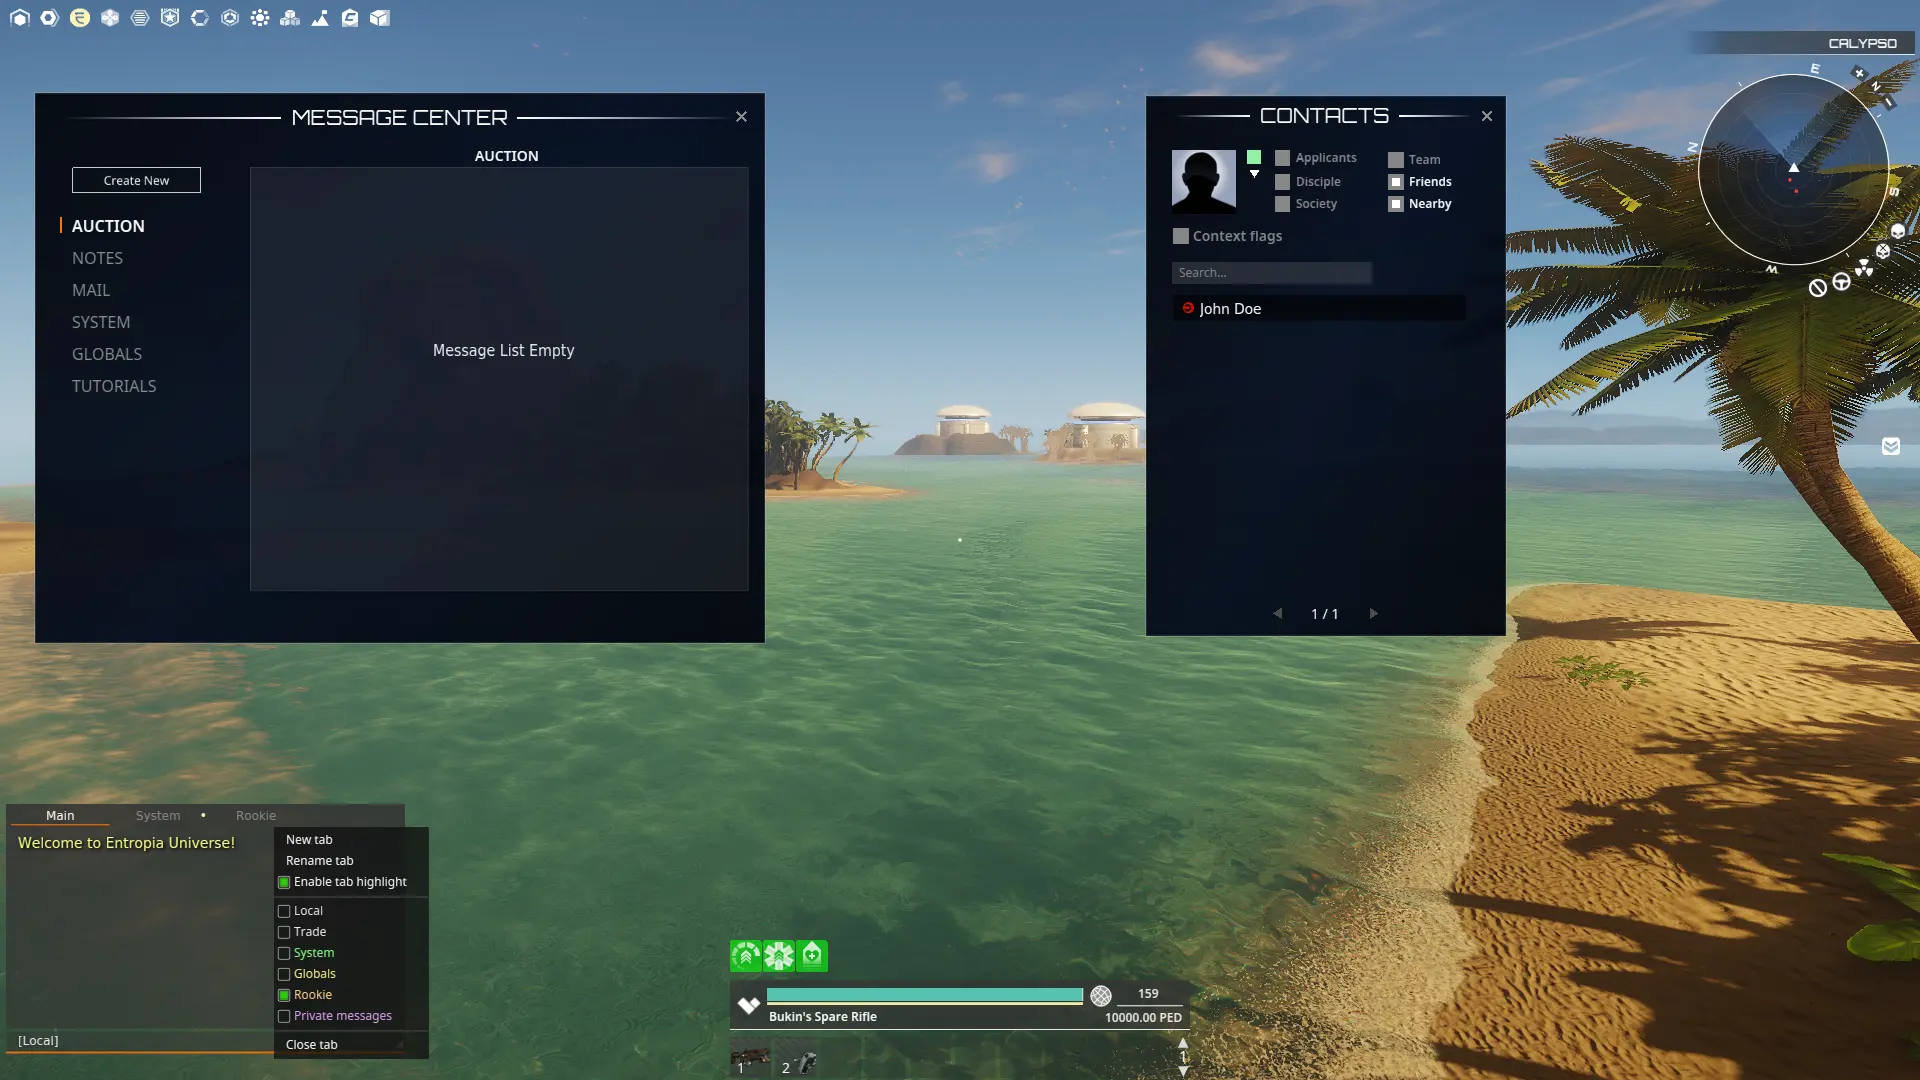
Contacts
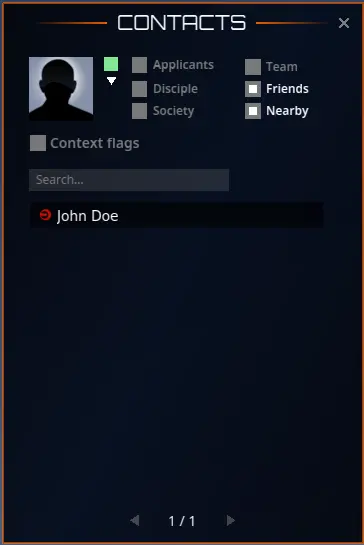
Press the “U” (default) key to open your [Contacts]. The [Contacts] window keeps track of your friend's list, society, nearby players, and more.
Your profile shows your Avatar's thumbnail picture in the top right of the [Contacts] window. Click on the thumbnail to open the [Profile] window to set your online status, name format, and public biography. Update your profile and say something about yourself to find other Avatars with similar interests.
You can filter Avatars by toggling the different options set under the Filter Panel (toggle the filter panel visibility by the arrow in the top left). Choose between Applicants, Disciple, Society, Team, Friends and Nearby.
Toggling the “Context Flags” adds icons like Nearby, Mentor, Friend, etc., next to Avatar names to make them more distinguishable. Click on any Avatar name in the list to see Avatar details, send messages, or initiate a chat.
In the Filter Panel, you can open the User Registry window to look up Avatars and send a request to add them as friends.
Message Center
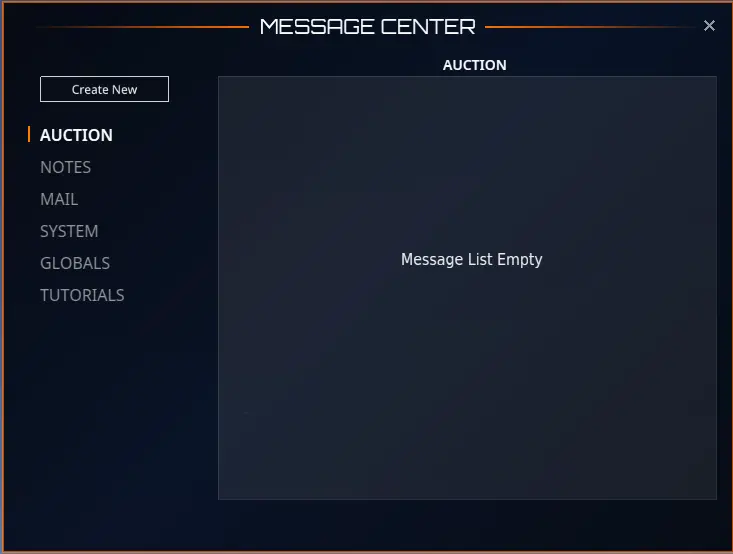
Press the “Y” (default) key to open your [Message Center]. The [Message Center], located by default in the top left of your screen, keeps track of all messages sent to you.
Compared to the [Chat], messages in the Message Center will only disappear if you remove them. If you wish to create a new message, click the [Create New] button on the top left.
The message center's content is split into six categories:
- Auction - Find your active auctions here
- Notes - Notes or Sticky Notes are short memory notes you want to keep for later. You can find all your saved sticky notes here
- Mail - Mail is longer text messages that don’t fit the chat channels. Mails can be sent to one or more Avatars simultaneously, even to offline Avatars
- System - System shows system alerts such as—--
- Globals - Find the latest Globals here
- Tutorials - Here, you can find instructions and tutorials on how to do things in Entropia Universe
Radar
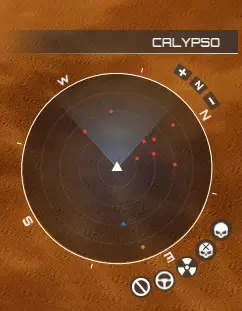
In the lower right corner of your screen, you will find the [Radar]. On top, you can see the name of your current location. The [Radar] displays various colored dots, with each color representing an interactable element within the game:
- Green - Player Avatars
- Red - Creatures
- Blue - Teleporters
- Orange - Non-player characters (NPCs)
- Yellow - Pets
- Purple - Society Members
- Dark Blue - Dead Creatures
Note: There are certain areas where a jam signal disrupts the Radar receiver, for example, in PvP areas.
The icons beneath the [Radar] display status information for your current or nearby areas, changing from white to orange or red to alert you of the zones ahead. The icons are as follows, in clockwise order:
- PvP Zone - Orange means you're close to a PvP zone. Red means you're inside
- Lootable PvP Zone - Orange means you're near a Lootable PvP zone. Red means you're inside
- Toxic Zone - Orange means a Toxic zone is near. Red means you've entered a Toxic Zone
- Vehicle Restrictions - Orange warns you're near a no-vehicle area. Red means you're in a no-vehicle area
- Area Restrictions - Orange shows you're close to a restricted area. Red shows you're in a restricted area
You can toggle coordinates on or off in [Options] to see the longitude and latitude on your [Radar]. Go to [Options] by pressing the “O” key. Go to [Interface] and toggle “Show location in the Radar UI.”
To resize the [Radar], you must enable [UI Edit-Mode] by pressing “L.” Hold the mouse button down on the bottom right arrow of the [Radar] and drag the mouse to resize the [Radar] window.
Status Information
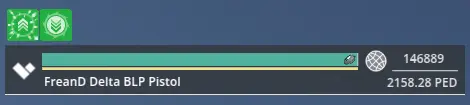
Between the [Main Chat] and the [Radar], you will find your status information:
Your Avatar name, Health bar, PED balance, equipped tool with some information, and the tools reload bar.